Directing Audio
Here we explain how to pipe your system audio directly to LedFx without having to use a microphone or any other peripheral devices.
Linux
Tested on Ubuntu 20.10 64-bit
Requirements
Instructions
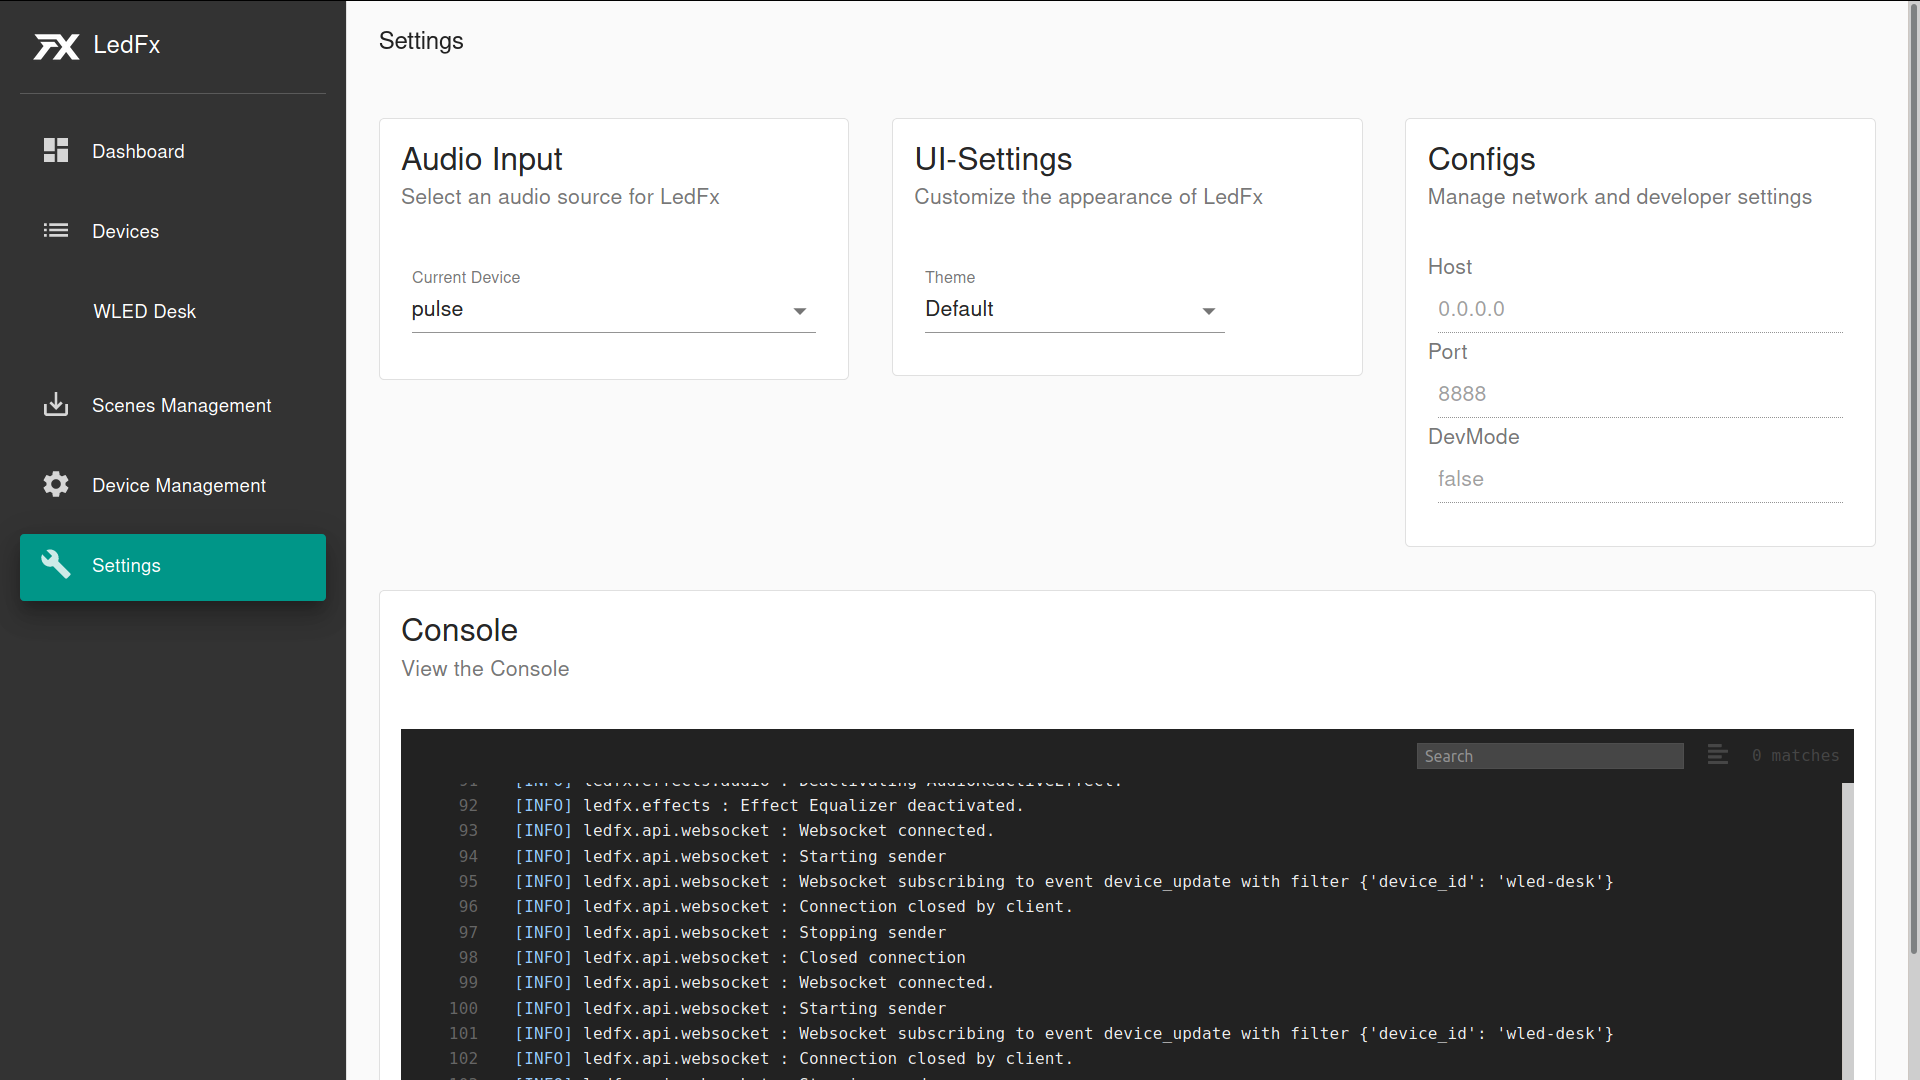
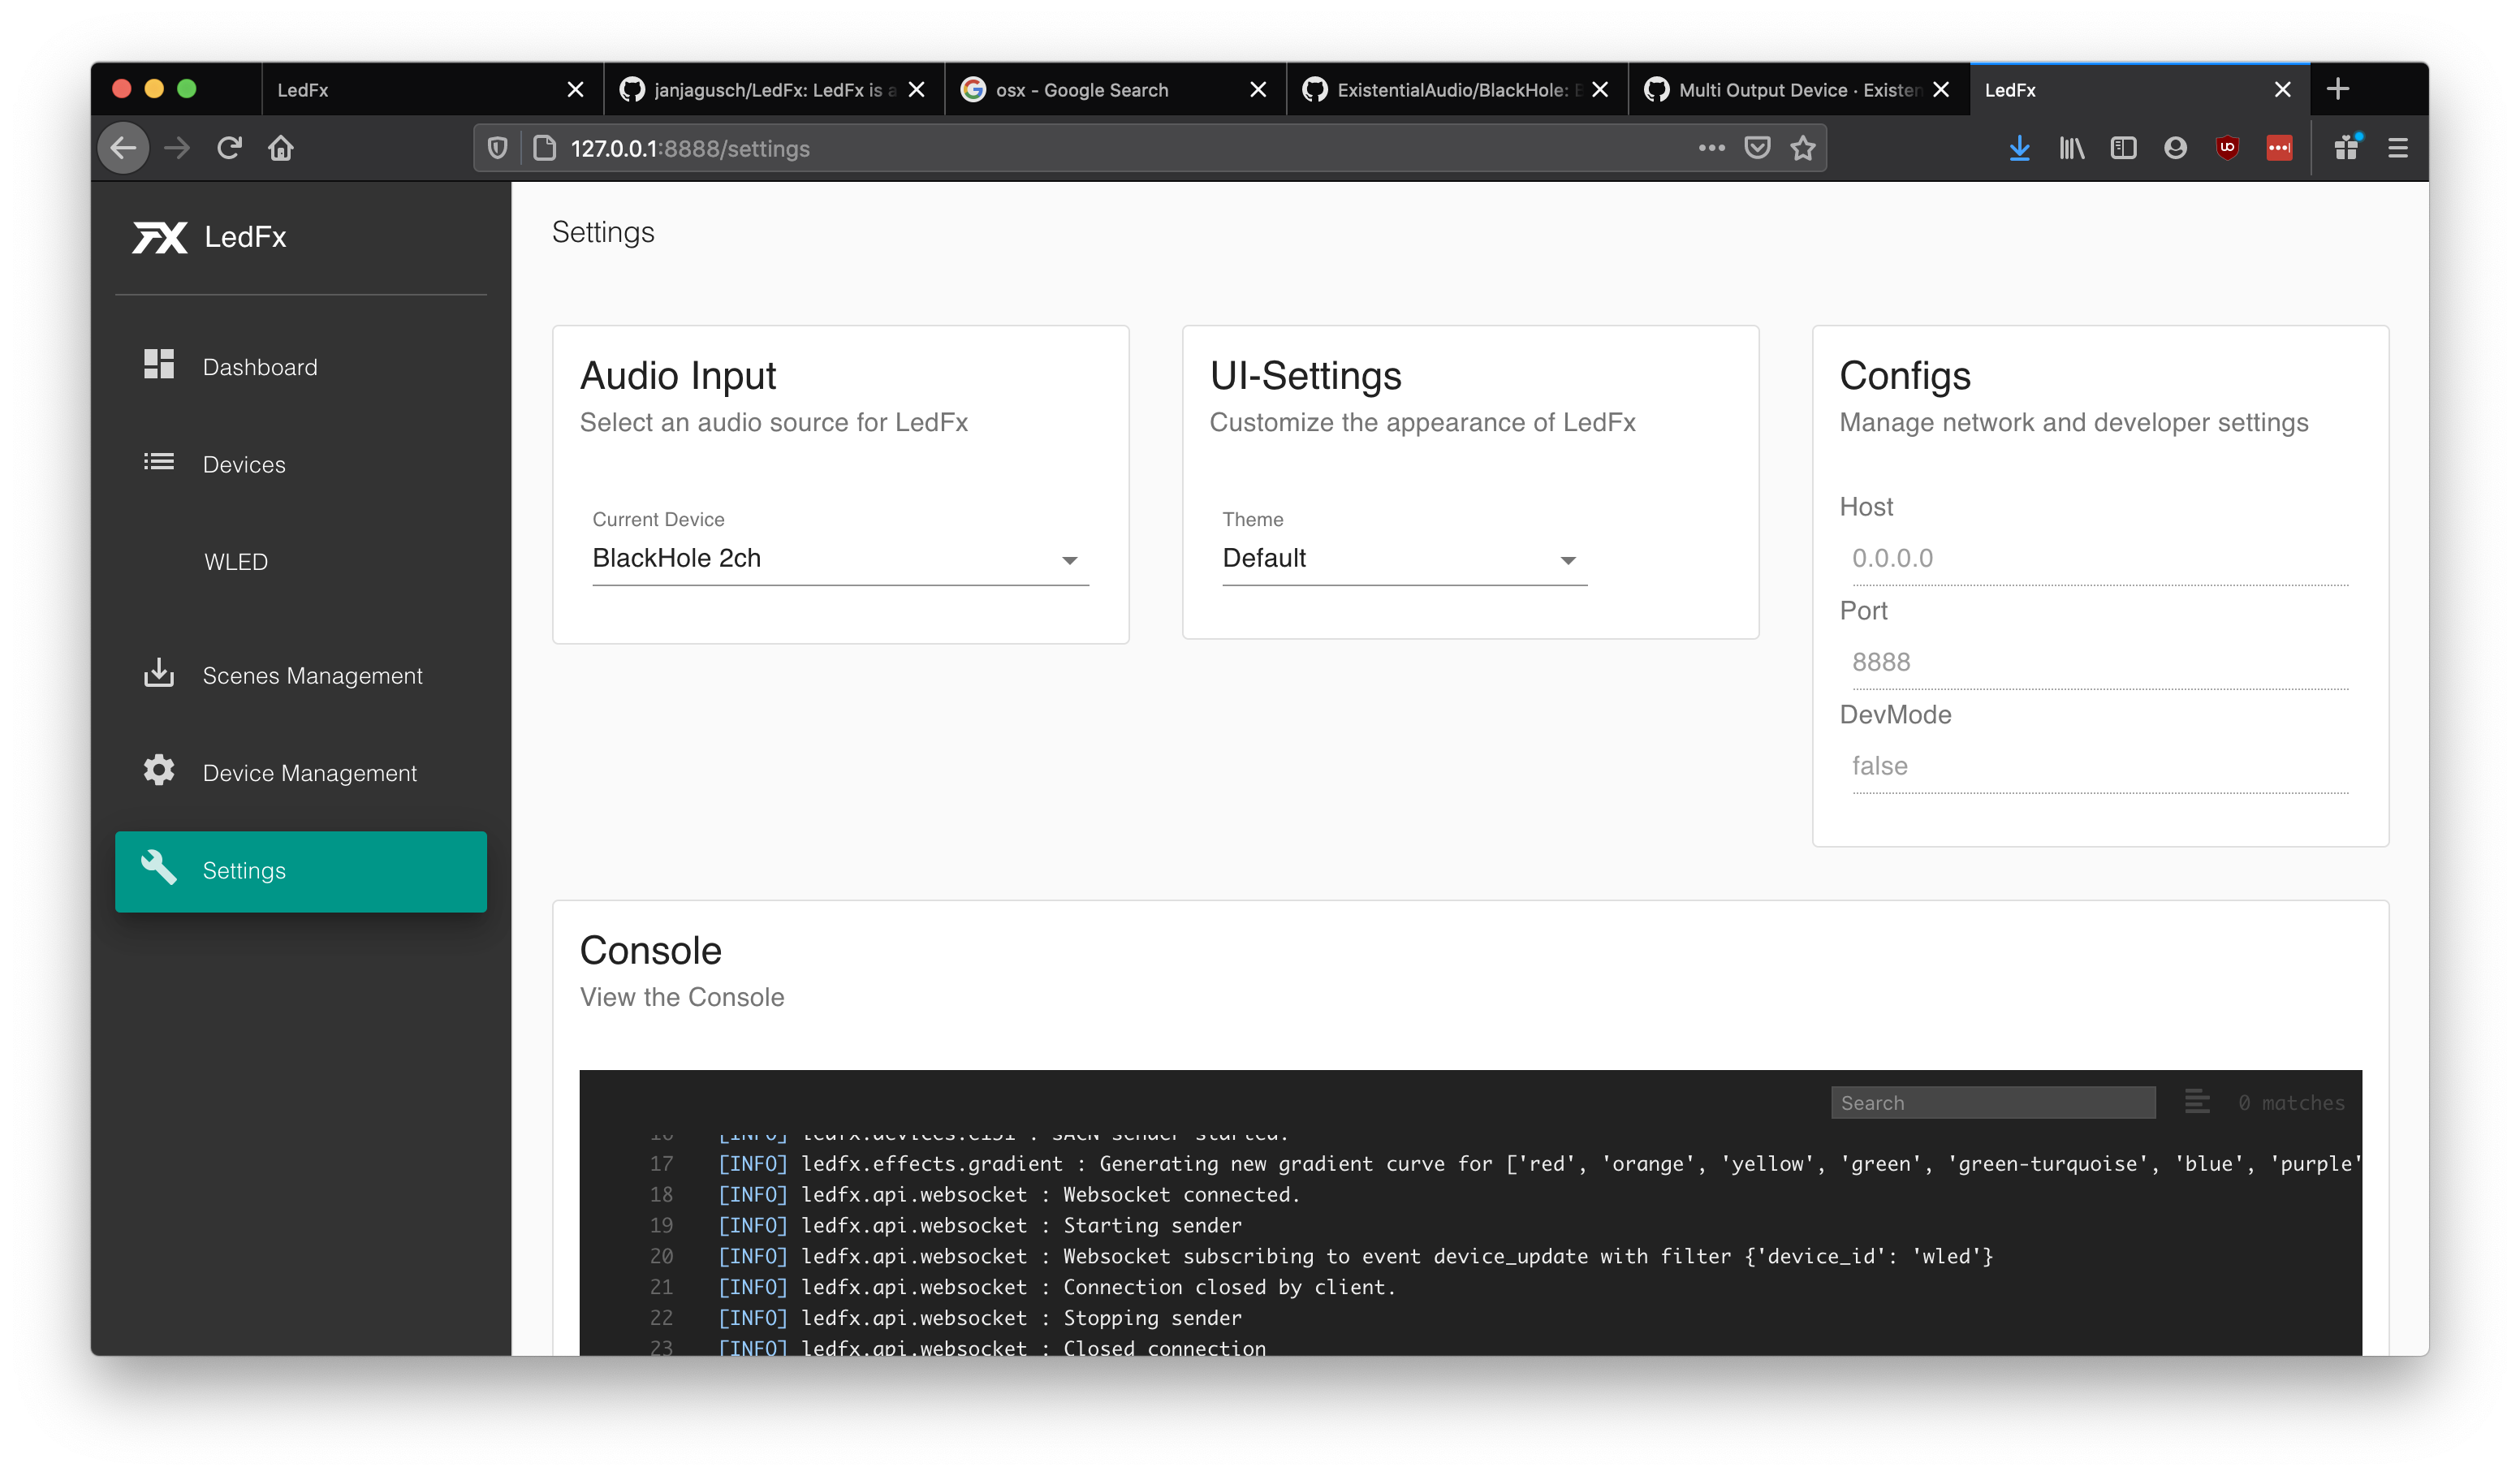
In the LedFx UI under “Settings” -> “Audio Input”, choose “pulse” as the current device
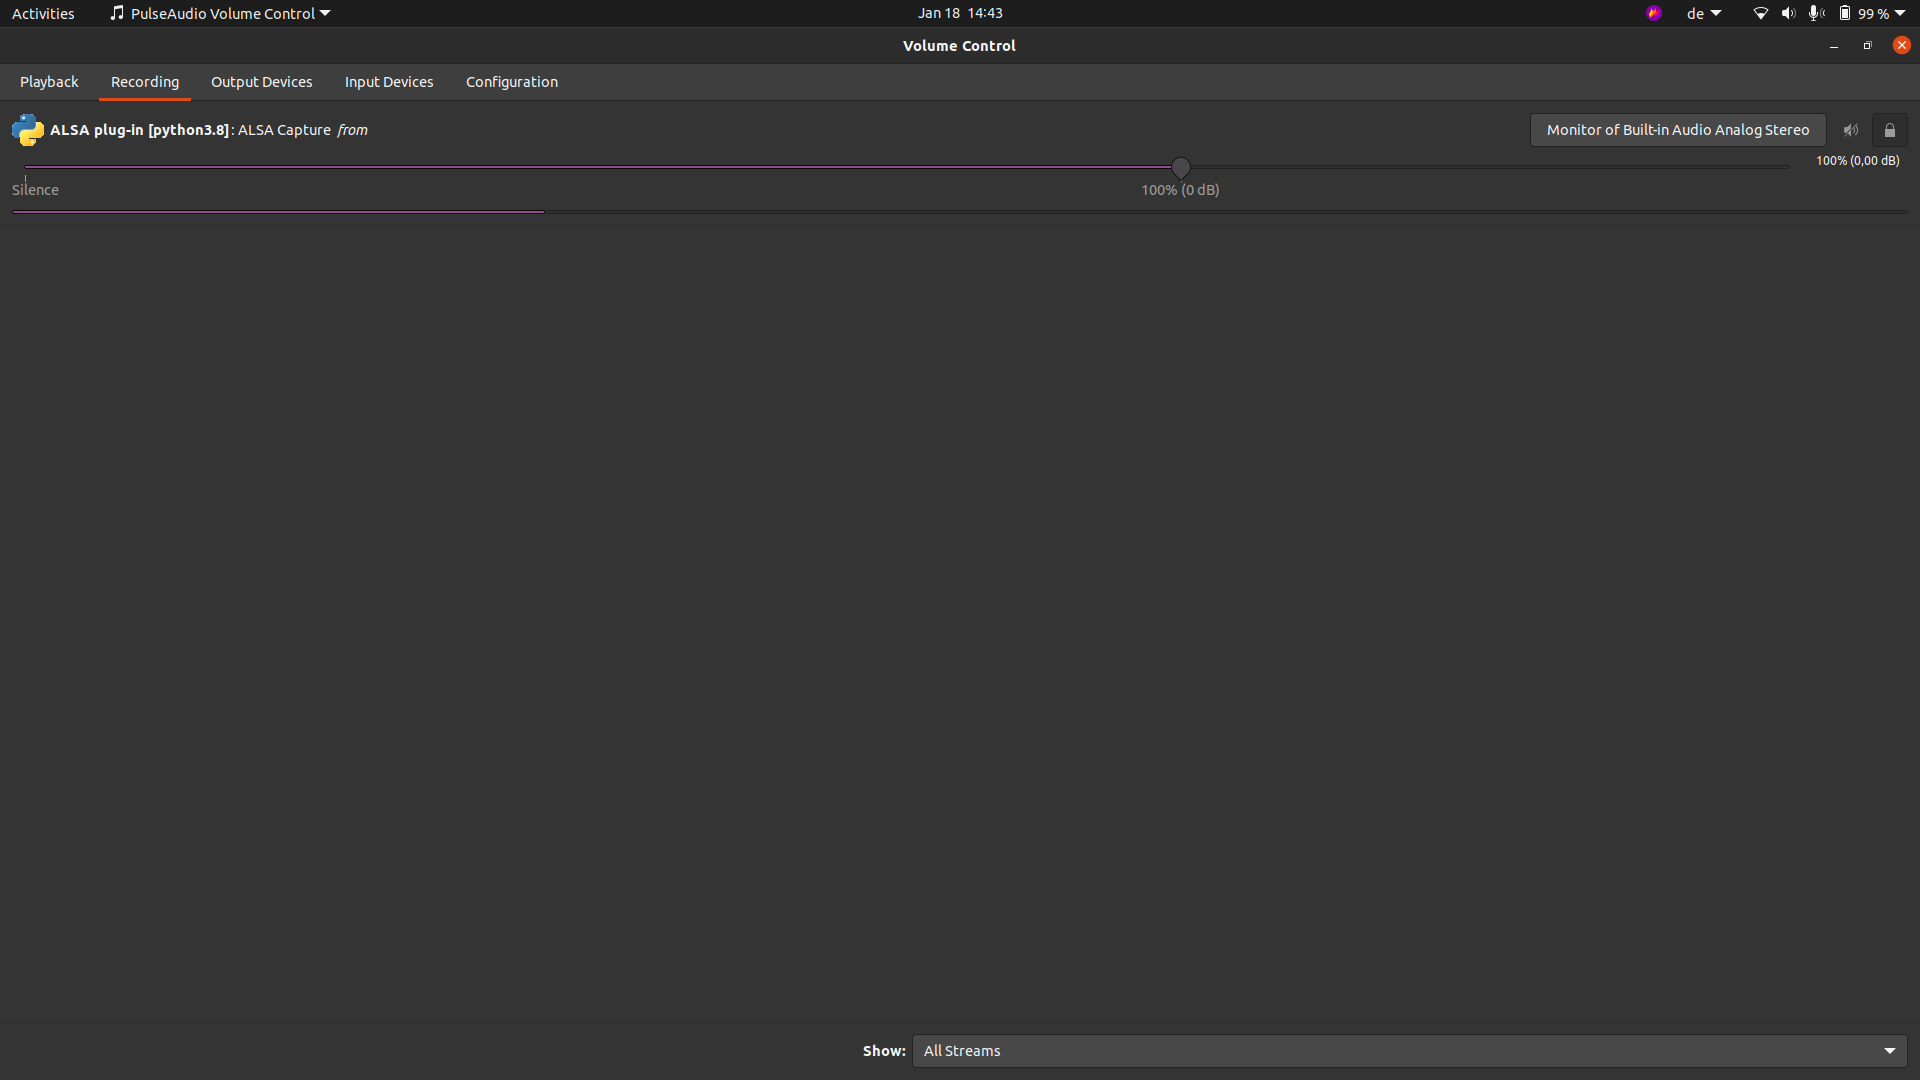
In PulseAudio Volume Control under “Recording”, choose “ALSA plug-in” and set “Capture from” to the audio stream you want to capture (e.g. “Monitor of Built-in Audio Analog Stereo”)
macOS
Tested on macOS Catalina 10.15.7
Requirements
Instructions
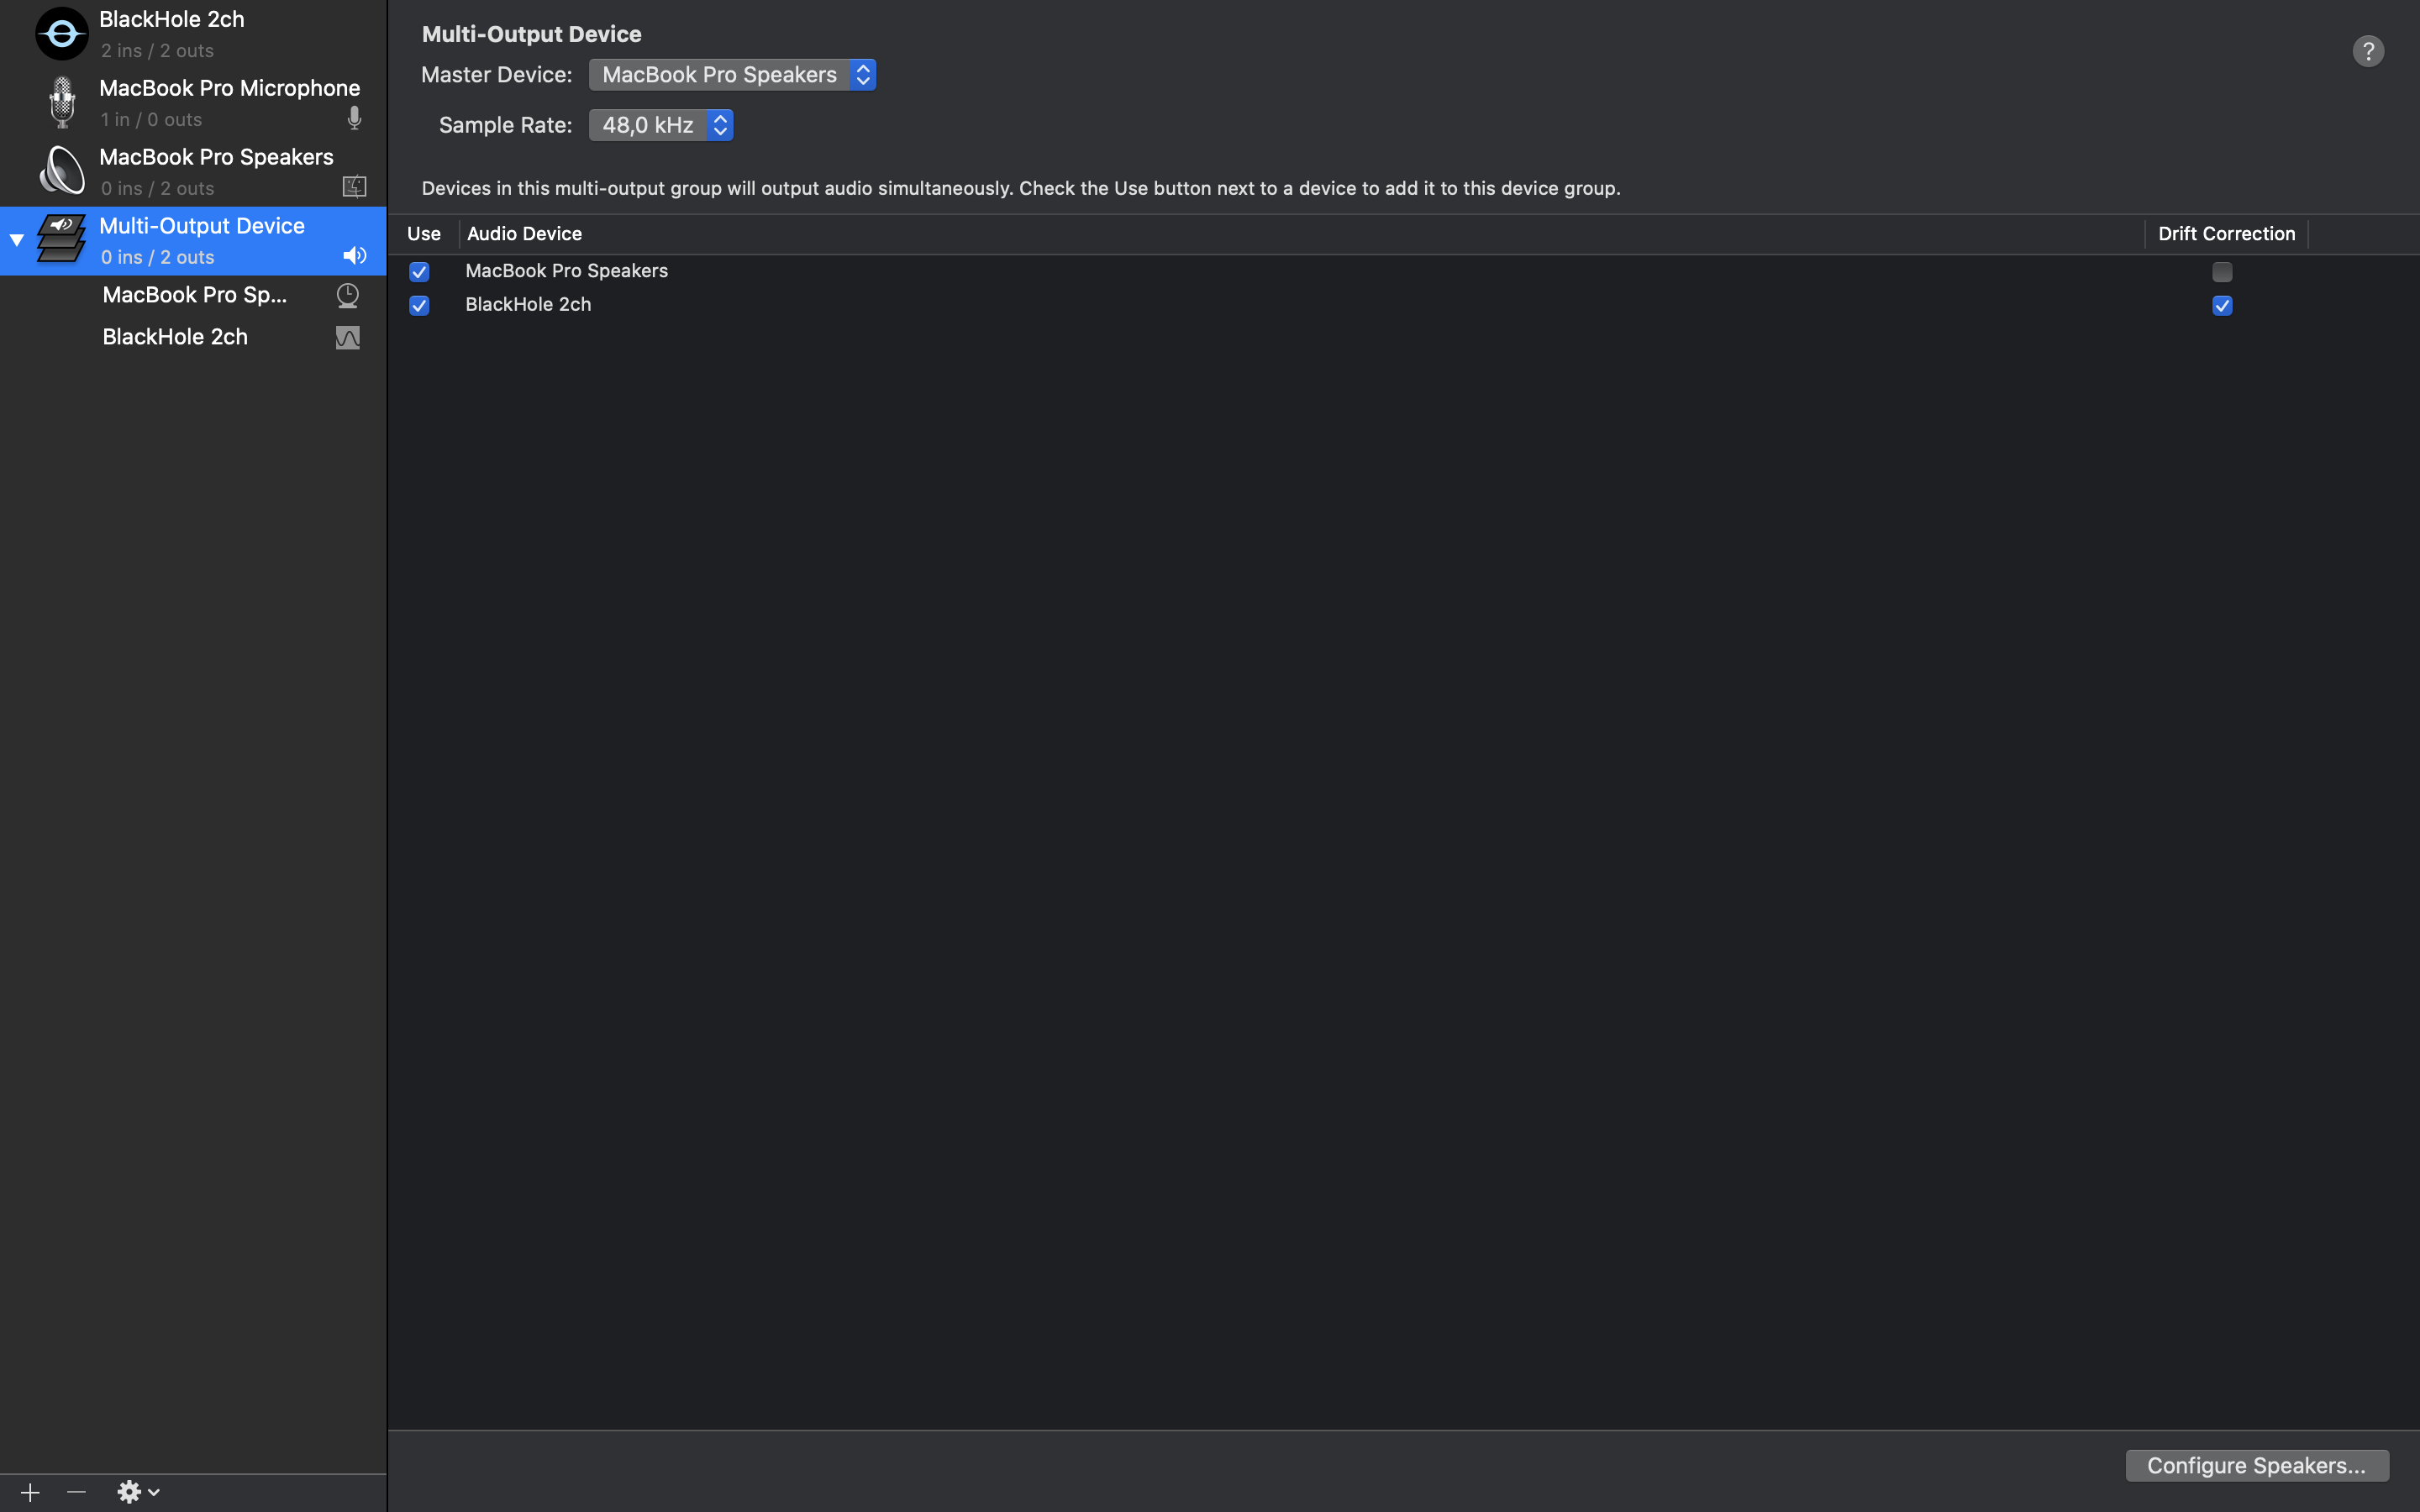
In Audio MIDI Setup, create a Multi Output Device
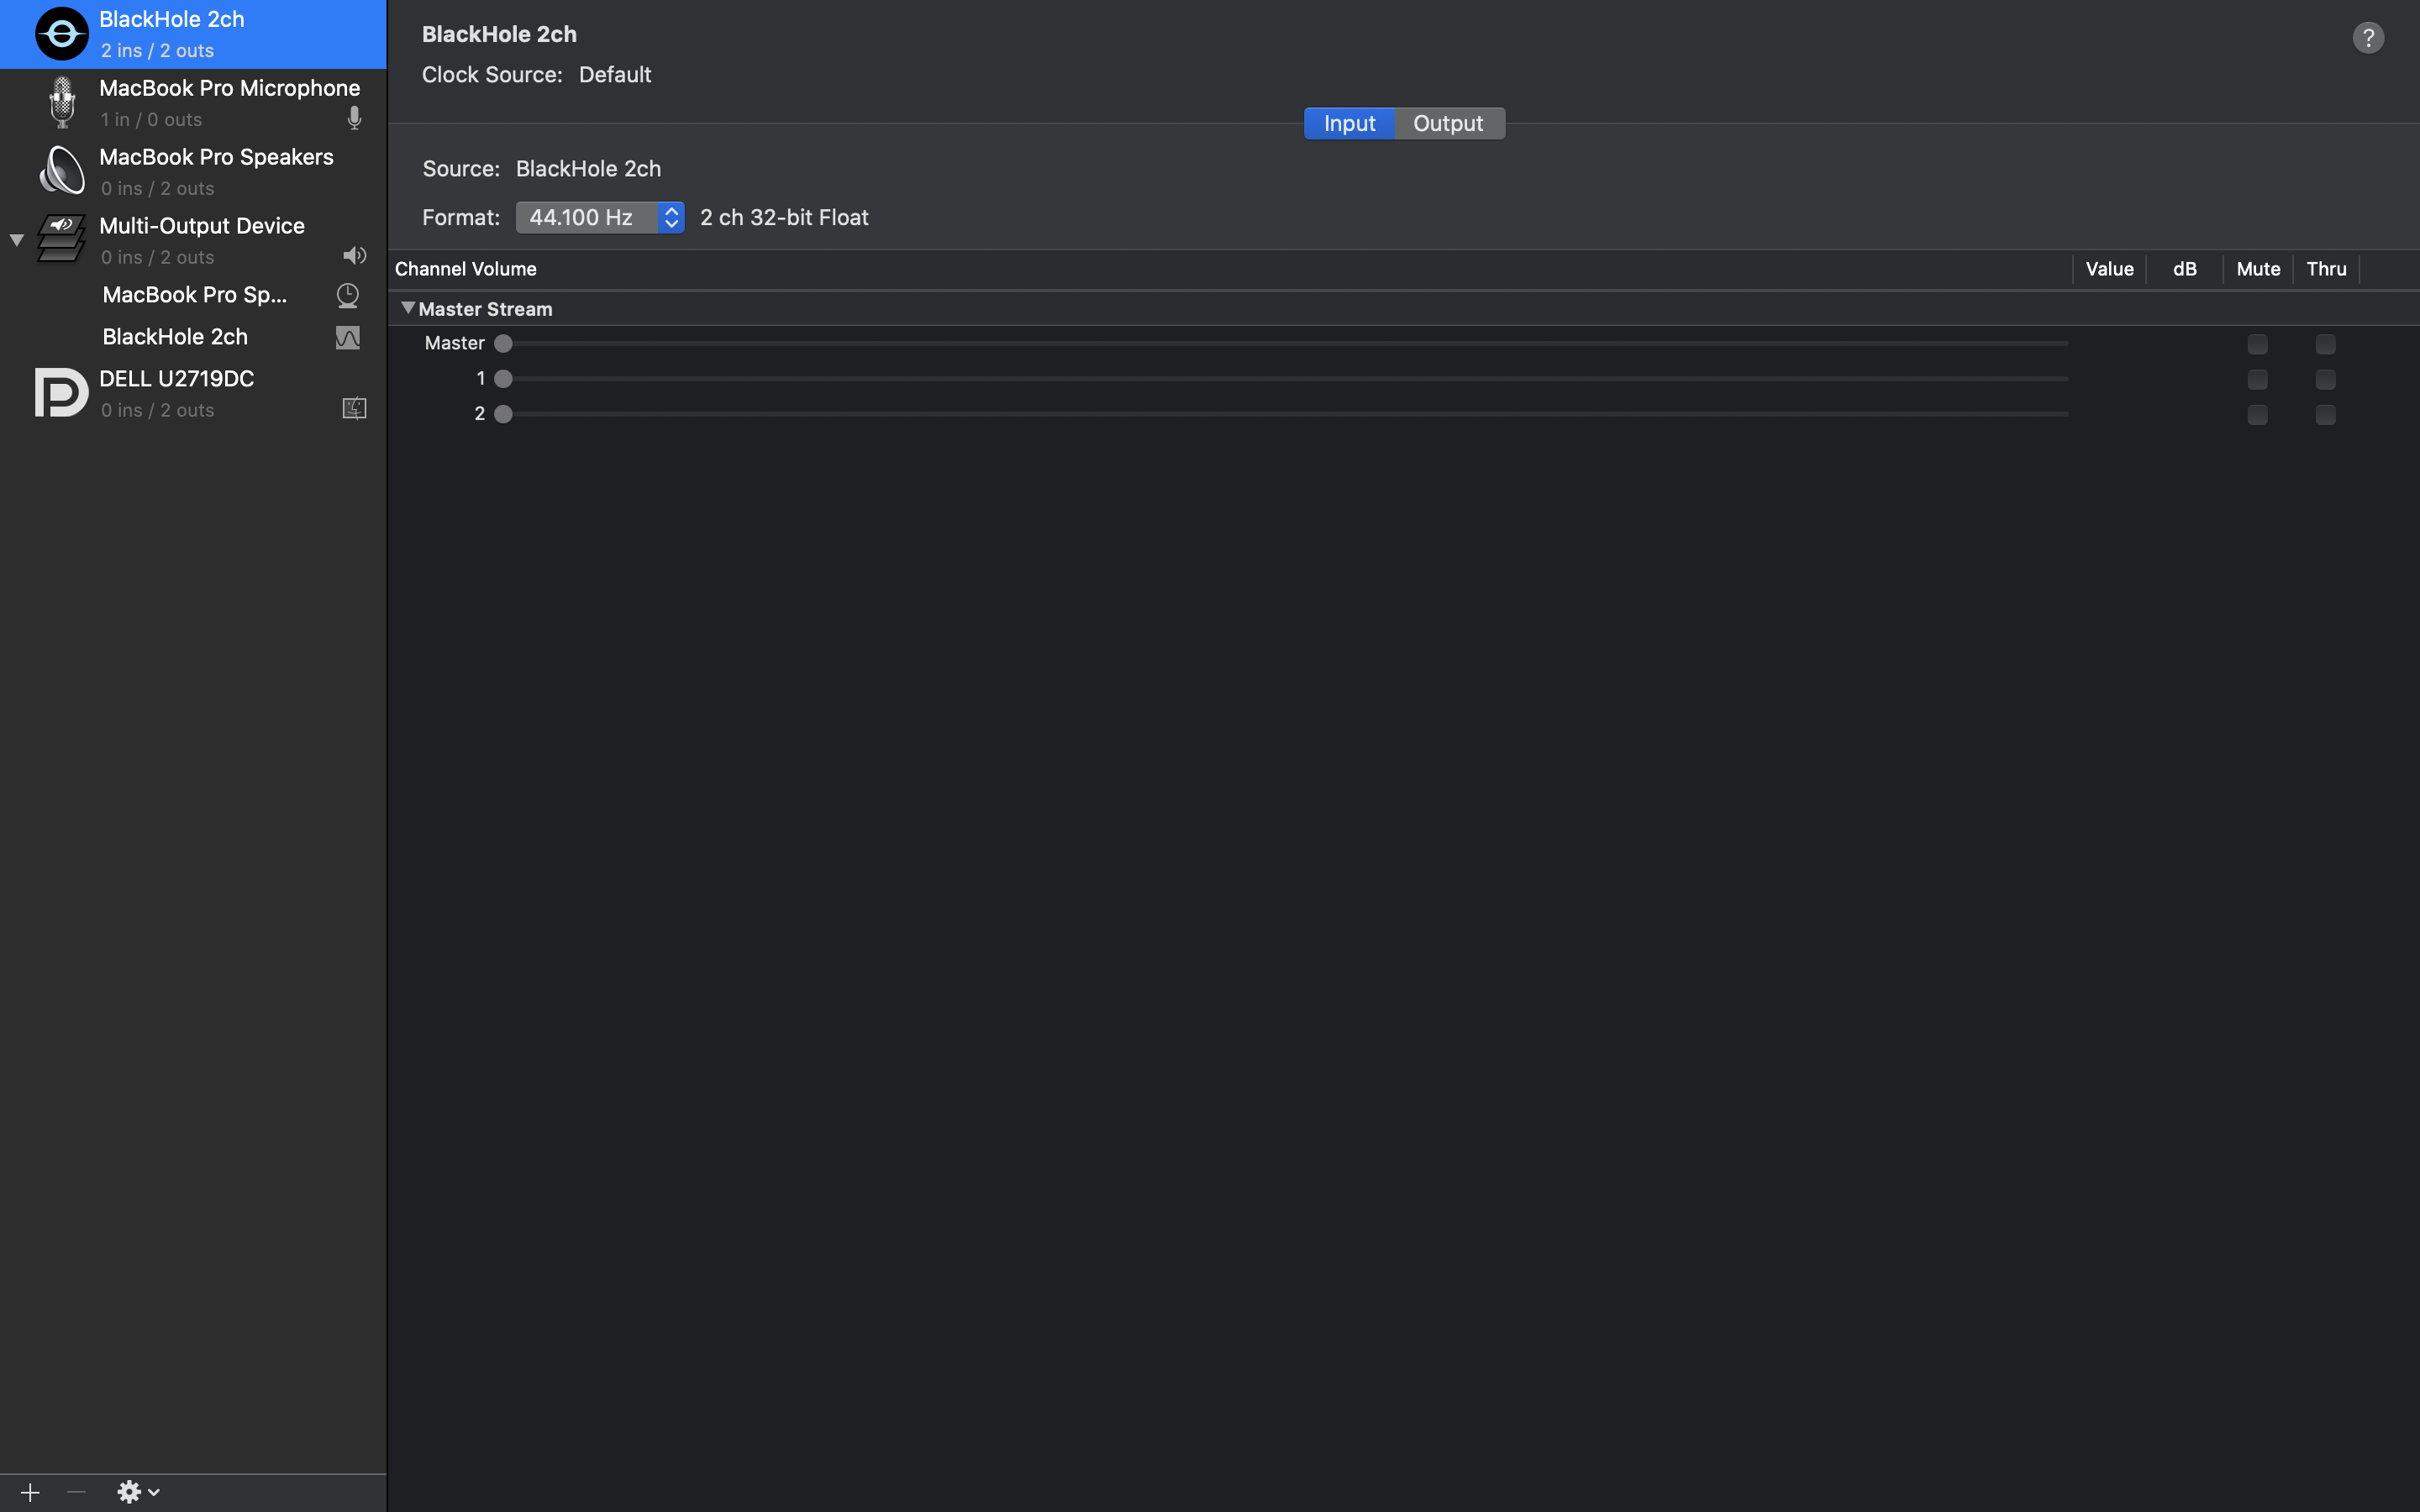
In Audio MIDI Setup, choose “BlackHole 2ch” and set it as “Input”
In the LedFx UI under “Settings” -> “Audio Input”, choose “BlackHole 2ch” as the current device
Alternatives
Loopback: Can direct the audio output of individual applications but requires expensive license to run more than 20 minutes.
Windows
Tested on Windows 10 (21H2)
Windows have output devices and input devices. LedFx works processing an input device.
Stereo Mix (analog output)
Follow the instructions described in the link to ensure the “Stereo Mix” Device is available: https://thegeekpage.com/stereo-mix/
The result should be something like:
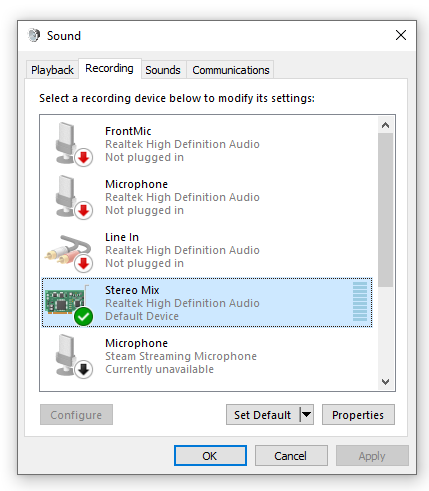
Once the device is set as “Default Device” (right-click, Set as Default Device), all generated analog sound from the PC should be “mixed” into this input device and LedFx should work appropriately.
If your current setup uses a digital output (e.g.: HDMI), “Stereo Mix” won’t capture sound and an external tool needs to be used. An example configuration is described below.
External Tool (digital output)
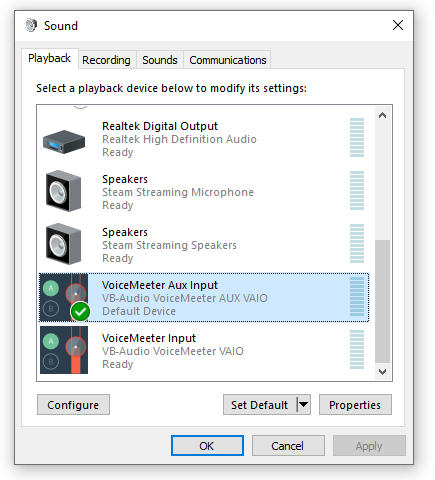
Using digital outputs, an external tool such as https://vb-audio.com/Voicemeeter/banana.htm is needed. Other “virtual devices/cables” applications should work similarly.
Once the tool is installed, set the tool’s playback device as default:
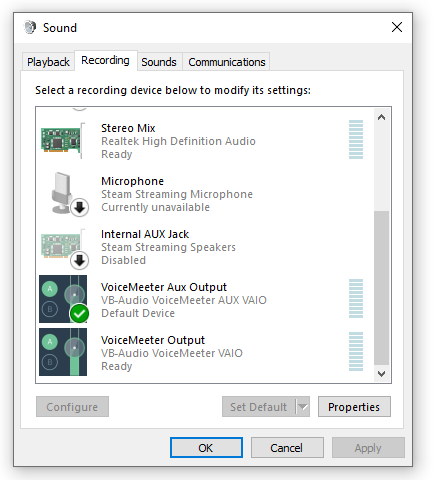
Set the matching “Recording” device as default:
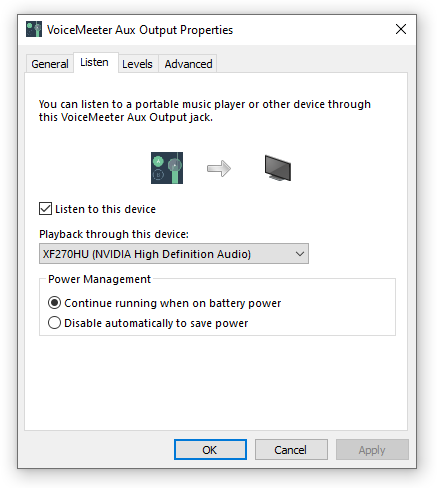
And if you want to still listen to the audio on the digital output, you can use the set the “Listen” device on the “Recording” input (right-click -> properties):
Webaudio
Warning
This feature is still in alpha.
Enabling
Go to settings and enter “AlphaMode!” and a window saying “dev mode activated” should appear.
Then in the same bar enter “BladeAlpha” and then click on the UI setting.
In the UI settings first enable expert mode and then you should see alpha mode, which you need to toggle on.
Open the alpha settings under client features and enable webaudio setting.
Usage
When your main LedFx instance (the one that is connected to all lights) is running, open another instance on another device (make sure webaudio is enabled on new instance).
In settings, under core settings, expand audio and you should see an icon that looks like this:
Click on that icon and a small window should appear where you can enter the name for your device. Enter the name and click on the check mark.
In your browser you should get a pop-up which asks you to give permission to the site to use your microphone/other audio input, confirm it.
Refresh the webpage of the main LedFx instance and in the audio settings select your newly created device. Now your lights should be visualized from the audio of the other device.
Note
If audio is not being sent or you were not able to allow microphone permission, it may be due to running LedFx without HTTPS. In this case the solution is either to run LedFx as HTTPS or to allow media devices in your browser to be accessed without HTTPS. To fix this:
Firefox: https://stackoverflow.com/questions/60957829/navigator-mediadevices-is-undefined/66605018#66605018
Chrome: https://sites.google.com/a/chromium.org/dev/Home/chromium-security/deprecating-powerful-features-on-insecure-origins (specifically “Testing Powerful Features” section)
Type Setting
When creating a new webaudio device, you may see, below the name entering field, an ability to choose between ws-v1 and ws-v2. Unless something does not work, you should always use ws-v2. The reason for that is ws-v2 using significantly less bandwidth. The ws-v1 setting sends audio data (which is float type) as plain text, meaning that for each number a byte is sent (can be up to 6 bytes per number), even though the audio data being sampled is only 16-bit. The ws-v2 setting instead sends the audio data as base64, which is a binary data encoding method, greatly reducing the used bandwidth.